Using your staff

Every game week you'll place your staff on the game board, prioritising the most pressing tasks. Each player will take turns placing their staff, and the player who is first to place rotates on a weekly basis. You'll only start with 3 staff members so make sure you use them wisely.

If you expand your club facilities you will end up with a crucial 4th staff member. Read below to find out how to utilise your staff.

Club Manager game box

Marketing

Your club will need income to buy new players, pay wages, and develop club facilities.

You get a guaranteed income of £1 for every worker you place here.
You have a chance of making more money by rolling the marketing die.

The Marketing die is a modifier: if you roll x2 then your income is [total number of your workers] x 2.
If you roll the prima donna icon, your total income is [number of your workers] x [number of prima donnas in your squad].

Scouting and Tactics

These are two separate spaces on the game board. Scout cards give you an on-field advantage against your next opponent only, while tactical cards can be used in any match. They tend not to be as powerful as scout cards. Both can be crucial for bringing home the points!

Scouting and tactical cards

Physio

Some players have the worst luck with injuries! When that happens, the physio is your friend.

For every worker placed here you can cut a player’s injury time by one week. You may place two workers here in order to treat two players. A player with a one-week injury cannot be healed by the physio.

A player who has only one week of injury time may be picked to play in your next match, but they could pick up an injury that will rule them out for the entire season.

Speak to agents

If you want to bypass the transfer market and avoid a bidding war, then use speak to agents.

If you have a worker placed here, take the top three cards from the transfer pile. You may bid for one player without rival bids from any opponent.

There is even a 'super agent' feature, but more of that on the transfers page!

Transfer market

Every week when the transfer window is open, the transfer market will show 6 available players. You may bid for as many players as you have workers placed here. But so too can your opponents, and you might find yourself in a bidding war!

Read more about this on the transfers page!

transfer market

Youth scouting

If you need some new blood in your squad, youth scouting might be for you!

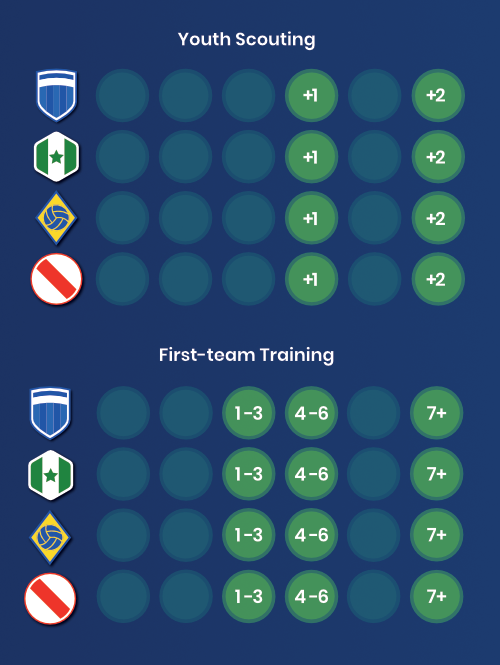
For every worker you place here, move your scouting marker one step along the discovery track. When you reach the +2 at the end, take the top two youth player cards. You get to keep one.

First-team training

As you have seen on the players page, most players have the potential to improve their skills. This block is where you achieve that!

For every worker you place here, move one space forward on the development track. When you reach the 1-3 marker, you can upgrade a player’s ability by 1 point, so long as their current ability level is between 1 and 3. Hit the 4-6 step or the 7+ step to upgrade a players who are within those ability ranges. Reset your counter to zero when you have upgraded a player.

Youth scouting and first-team training
Club facilities

Facilities management

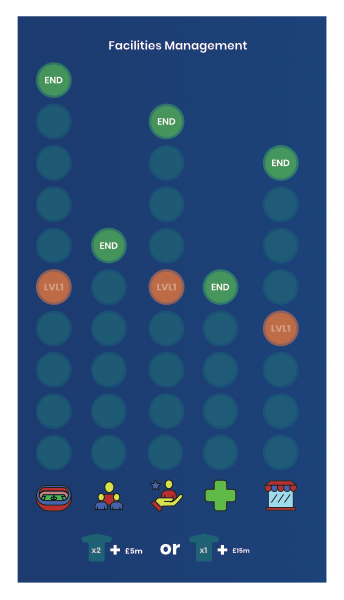
This is where you'll improve your club facilities, but to do so will take a great deal of time and money. Club Manager is a 10-season game, remember!

You can improve your stadium, recruitment, youth academy, medical facilities, and club store. Each improved facility brings a very worthwhile bonus.

There are two ways to move up the track: (1) place one worker and pay £15, or (2) place two workers and pay £5.

Take a closer look at the game's features:

Background Graphic

Get your copy

Order Club Manager and have it delivered in March 2027

Pre-order now